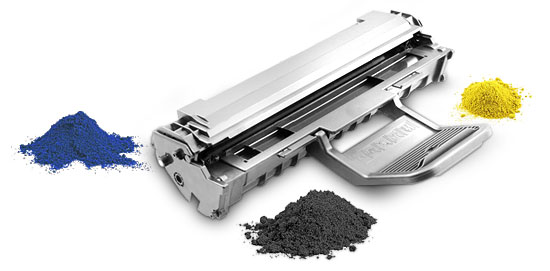
Remanufacturing the Samsung SCX-4200 Toner Cartridges
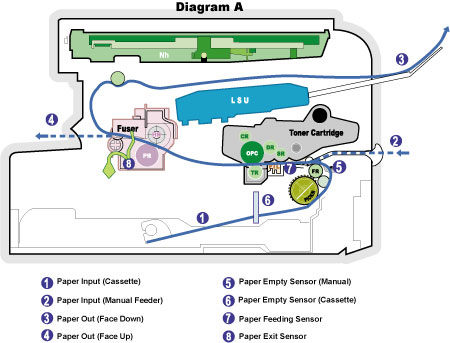
The Samsung SCX-4200 engine is a 600-dpi, 18-ppm laser engine that prints copies and scans. No fax options are available for these machines. They are a light-use machine with the duty cycle rated for 800 copies/month. One interesting thing to note is that the service manual lists the machine life as five years or 50,000 pages, whichever comes first. The fuser, paper pickup rollers, transfer roller and separation pad are all rated for 50,000 pages. So basically when they wear out, according to Samsung, it's time for a new machine!The SCX-4200AD3 cartridge is similar to other Samsung cartridges, but just slightly different so we decided to write separate instructions. The cartridge and printer theory are standard monochrome and but I have included a diagram of the machine and cartridge below as I find it interesting and helpful sometimes to see the cartridge in relationship to the machine and also the actual paper path. See Diagram A.

As with most Samsung cartridges, these cartridges do not have a drum cover, and come new with a piece of heavy paper taped around the cartridge.
The standard
cartridge (Samsung part SCX-4200AD3) comes new with 90 grams of toner,
and is rated for 3,000 pages at 5 percent coverage.
The starter
cartridges that come with the machines, however, are only rated for 1000
pages.
There is a chip on the cartridge that must be replaced
each cycle.
Printing test pages, cleaning pages and troubleshooting will be covered at the end of the article.
Remanufacturing instructions
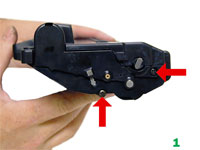
[1] Remove the two screws on the right-side end cap. See Figure 1.
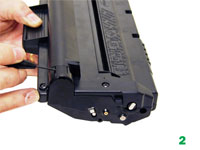
[2] Pry up on the fill plug cover with a small jewelers screwdriver. Remove the end cap. See Figure 2.
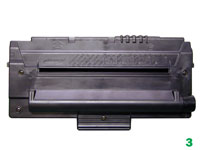
[3] Place the cartridge with the handle facing up. Remove the five top cover screws. See Figure 3.
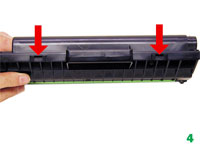
[4] Underneath the handle of the cartridge to the right and left are two plastic tabs. GENTLY pry them up, and lift the back side of the cover up. See Figure 4.
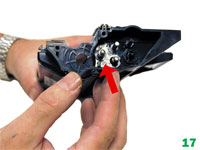
[5] On the front edge of the cartridge there are two more tabs. Press these two tabs in and lift the cover off. See Figure 5.
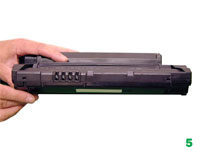
CAUTION: The upper half of the toner hopper is being removed. If there is a lot of toner left in the hopper, it can dump out all over! Vacuum the hopper clean.
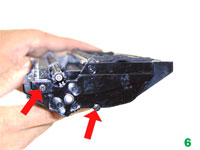
[6] On the remaining end cap, remove the two screws. Remove the end cap. See Figure 6.
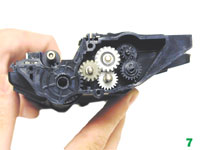
[7] On the right side there is a series of gears under the end cap. Make a note of the location of each gear, and remove them. See Figure 7.
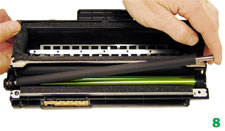
[8] Remove the PCR. See Figure 8.
[9] Clean the PCR with your normal PCR cleaner.
WARNING: Do not clean the OEM PCR with alcohol, as this will remove the conductive coating from the roller. If the PCR is an aftermarket, follow the cleaning methods recommended by the manufacturer. If the PCR is an OEM, we recommend it be cleaned with your standard PCR cleaner.
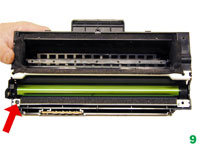
[10] Remove the single screw on the PCR cleaning assembly and gently pry the blade up. Note that there are not any alignment tabs or posts to worry about. This PCR cleaner also has what can be considered a wiper blade. It is a very flimsy blade attached to the metal bar. Wipe this blade down with a clean, lint-free cloth before re-installing. See Figures 9 and 10.

[11] It is very important that the PCR cleaner be cleaned. Vacuum or blow off any residual toner from the foam/felt.
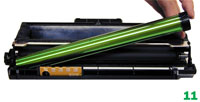
[12] With the PCR cleaner assembly removed, the drum can easily be removed by lifting it out. See Figure 11.
[13] Clean out any remaining toner from the cartridge.
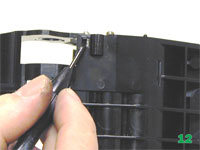
[14] Press in on the bottom tab of the developer roller plate (right side) to release it. See Figure 12.
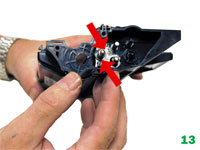
[15] Slide the entire plate toward the edge of the developer roller cavity, and lift up. The plate should come loose. You may have to remove the metal washer on the developer roller shaft to remove the plate. You can also just leave the washer and plate on the roller shaft if that's easier for you. See Figure 13.
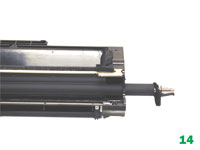
[16] Remove the developer roller. Be careful not to damage or lose the flat washers on the roller. I left the plate and washer on the roller shaft here. See Figure 14.
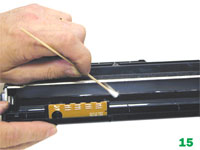
[17] It is highly recommended that the doctor blade be cleaned. Failure to do so can cause streaking. The doctor blade can be cleaned without removing it. Dampen a cotton swab with alcohol and clean the blade. Be careful not to press too hard and damage the blade. If the blade has a heavy buildup of toner on it, clean it with Acetone, and then alcohol. Replacement doctor blades are available if your blade is damaged or worn. See Figure 15.
[18] Replace the developer roller, and flat washers. See Figure 16.

[19] If no grease is left on the gears and gear shafts, or it is contaminated with toner clean it all off. Replace it with white lithium grease. Be sure to clean and grease the gear shafts, and inside the gear.
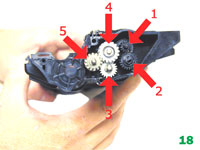
[20] Replace the roller plate and five gears. When installing the plate, do it the opposite of how it came out. Keep it toward the front edge so that the small tab on top fits behind the wall of the cartridge. Look carefully at the picture of the gears. Each gear must fit in this exact way. The gears are labeled in order of installation. See Figures 17 and 18.
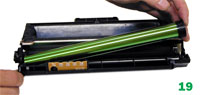
[21] Install the new drum in place. See Figure 19.
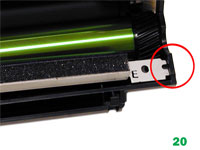
[22] Install the PCR cleaner assembly and screw. The right side of the assembly has fingers that fit into the cartridge wall. See Figures 20 and 21.

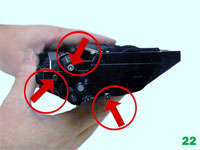
[23] Clean the conductive grease off the left side end cap and replace with fresh grease. Make sure the PCR fits correctly in its holder, and all the gears are aligned. Replace the end cap and two screws. See Figure 22.
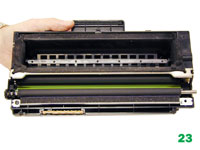
[24] Install the PCR. See Figure 23.
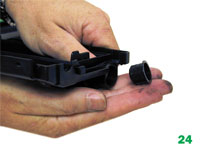
[25] Remove the fill plug from the top cover. See Figure 24.
[26] Replace the chip inside the top cover. See Figure 25.

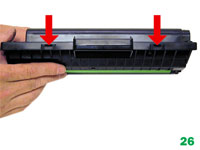
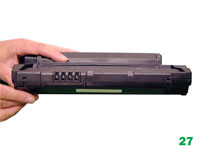
[27] Carefully snap the cover on making sure all the tabs lock in place. See Figures 26 and 27.
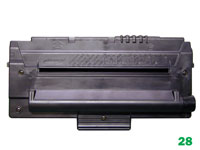
[28] Install the five screws in the top cover. See Figure 28.
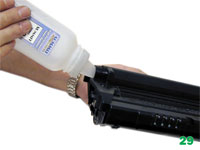
[29} Fill the hopper with the SF-560 toner. See Figure 29.
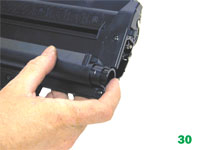
[30] Install the fill plug, check for leaks. See Figure 30.
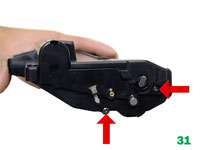
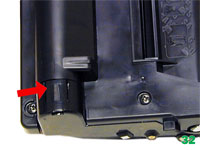
[31] Install the remaining end cap and two screws. Make sure the top of then end cap snaps into place over the fill plug. See Figures 31 and 32.
Printing a Test Page:
The best way to run test pages is simply to make a copy. Take a printed page with both text and graphics, and run a few copies.
Printing a cleaning page:
Press the MENU button until "Maintenance” appears on the top line of the display. On the second line of the display, the first available item should show "Clean Drum.”
Press START
When the machine asks you to confirm, press START again and the cleaning page process will start.
Machine error codes
As with most of the newer Samsung models, the error codes are all in English and are self-explanatory. The biggest problems you will run into are paper jams and a dirty.scanner. Keeping the machine clean with periodic maintenance will take care of most of them.
Repetitive Defect chart:
OPC drum — 75.5mm
Lower pressure roller (fuser) — 75.3mm
Upper heat roller (fuser) — 64.0mm
Transfer roller — 45.3mm
Supply roller — 44.9mm
PCR — 37.8mm
Developer roller — 35.2mm