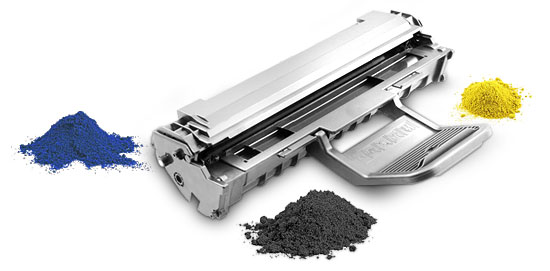
First released in January 2009 the Xerox Phaser 3250 printers
are based on a 30 ppm engine with a maximum resolution of 1200 dpi. The
first page out is stated to be under 8.5 seconds, and the printer comes
standard with 32MB of memory (Expandable to 160MB). Depending on the
model number, duplexing and a network card are built in.
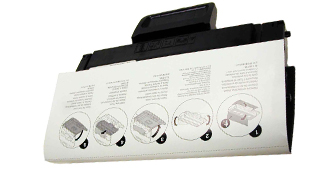
These cartridges do not have a drum cover, and come new with a
piece of heavy paper tapedaround the cartridge. See Figure 1.
All new cartridges opened so far have shown some toner leakage on the
drum that would have shown on any prints for at least a few pages.
The standard cartridge (Xerox part# 106R01373) is rated for 3,500
pages. The HY cartridge (Xerox part# 106R01374) is rated for 5,000
pages. As with pretty much all cartridges these days the cartridge has a
chip and it has to be replaced each cycle.
The 106R01373 has a list price of $88.99 and the 106R01374 has a
list price of $105.99*
There are two printers available in this series: the 3250/D
($279.00* list) and the 3250/DN $349.00* list).
Cartridge troubleshooting will be listed at the end of these
instructions
* Pricing as of March 2009
Required Tools
1) Toner approved vacuum.
2) A small common screw driver
3) A Phillips head screwdriver
4) Needle nose pliers
Required Supplies
Phaser 3250 Toner
New replacement chip
Conductive grease
99 percent Isopropyl alcohol
Drum lubricating powder
1) Place the cartridge with the handle up, facing towards you.
Remove the three screws from the right side end cap. Leave the end cap
in place for now. See Figure 2.
2) On the left side end cap, remove the three screws. See
Figure 3.
3) While still on the left end cap, locate the top tab. Press in on
the tab, and remove the end cap. The drum axle may come out with the end
cap. Separate the two. See Figures 4, 5, and 6.
4) On the right side end cap, press in on the top tab and remove the
end cap. See Figures 7 and 8.
5) Separate the two halves slightly, and lift off the middle top
cover. See Figure 9
6) Lift up on the drum/waste hopper and remove. If the drum axle
became loose, be careful to hold the drum so it does not become damaged.
Remove the drum/waste assembly. See Figures 10 and 11.
7) Remove the drum axle from the large gear side of the waste
assembly. Remove the drum. See Figures 12 and 13.
8) Remove the PCR from the assembly. See Figure 14.
9) Remove the PCR cleaning roller. See Figure 15.
9) Clean the PCR with your normal PCR cleaner.
WARNING: Do not clean the OEM PCR with alcohol, as this will remove
the conductive coating from the roller. If the PCR is an aftermarket
product, follow the cleaning methods recommended by the manufacturer. If
the PCR is an OEM, we recommend it be cleaned with your standard PCR
cleaner.
10) Remove both the PCR holders by pressing in on the tabs at the
bottom of the holder. These holders need to be removed to allow access
to the wiper blade. See Figures 16 and 17.
11) Remove the two screws from the wiper blade, remove the blade. See
Figure 18.
12) Clean out all the waste toner from the hopper. Make sure the seal
is clean. See Figure 19.
13) Install the cleaned or new wiper blade and two screws. See
Figure 20.
14) Install the two PCR holders. See Figure 21.
15) Blow off or vacuum the PCR cleaning roller. Install in the waste
hopper. See Figure 22.
16) Place a small amount of conductive grease in the holders, and
install the PCR. See Figure 23.
17) The large gear side of the drum axle shaft has conductive grease
on it. Regardless of if you are replacing the drum or not, clean the old
grease off, and replace with new. See Figure 24.
18) Install the drum and axle from the small gear side of the drum
into the waste hopper. Make sure the keyed end of the shaft is on the
large gear side. See Figure 25.
19) On the supply hopper, carefully pry out the fill plug and dump
out any remaining toner. The fill plug can be difficult to remove as it
is recessed. Take a small common screwdriver and work it around the
edge, lifting slightly until it comes loose. See Figure 26.
20) Remove the developer roller. See Figure 27.
21) Remove the two screws from the doctor blade, remove the blade. See
Figure 28.
22) Clean out all the remaining toner from the hopper.
23) Make sure the doctor blade sealing foam and the developer rollers
seals are clean and intact. See Figure 29.
24) Clean the doctor blade edge so there is no evidence of build up
along the edge. If any buildup exists, the cartridge will streak. No
chemicals should be used. We have found using a clean ice cream type
wooden stick works great for scraping the blade clean without damaging
it. See Figure 30
25) Install the doctor blade and two screws. See Figure 31.
26) Clean the developer roller with a dedicated DVR cleaner, and
replace into the hopper. See Figure 32.
27) Fill the hopper with Phaser 3250 toner, replace the fill plug and
check for leaks. See Figure 33.
28) Fit both sides of the waste hopper tabs into the toner hopper.See
Figure 34.
29) Slide the middle top cover/PCR assembly into place. Make sure all
the middle tabs fit under the edge of the waste hopper. See
Figures 35 and 36.
30) Clean the contacts on the left side end cap, and replace the
conductive grease. Align the drum axle keyed end so it will fit into the
keyed slot of the end cap. Snap the end cap into place. See
Figures 37 and 38.
31) Install the three screws into the end cap. See Figure 39.
34) Clean the contacts on the right side end cap, and replace the
conductive grease. Snap the end cap into place, and replace the three
screws. See Figures 40 and 41.
35) To replace the chip, drill out the two plastic rivets with a
small drill, remove the cover, and chip. See Figure 42.
36) Install the new chip and cover, insert two small screws that
correspond to the holes drilled to hold everything in place. See
Figures 43 and 44.
Common Cartridge Problems
Repetitive defect chart:
Upper heat roller: 77.6mm
OPC drum: 75.5mm
Lower pressure roller (1st): 62.8mm
Lower pressure roller (2nd): 37.7mm
Supply roller: 47.1mm
Transfer roller: 47.0mm
Developer roller: 35.2mm
PCR 26.7mm
This article originally appeared in the May 2009
issue of Recharger.