First released in May 2009, the Xerox Phaser 6280 Engine is a 31ppm
black and 26ppm color engine that runs at 600 dpi. The first page out is
stated to be less than 10 seconds, and the printer runs off a 400 MHz
processor. The memory comes standard at 256MB and is expandable to
1.2GB.
The chips on these cartridges need to be replaced each cycle.
There are Standard yield (STD) cartridges and High Yield (HY)
cartridges. A STD yield cartridge cannot be made into a HY version as
there are a set of gears in HY cartridges not present in STD yield. HY
cartridges use a second toner hopper based in the drum half of the
cartridge. This hopper is present in the STD yield versions, but the
necessary gears to move the toner are not.
These cartridges have a chip that must be replaced each cycle. In
addition, they also have gears on the supply hopper(s) that must be set
correctly for the cartridge to work.
The printers ship with a set of starter cartridges. The colors are rated for 2,200 pages and the black is rated for 3,000 pages.
Current machines based on the Phaser 6280 engine are:
Xerox Phaser 6280
Xerox Phaser 6280N
Xerox Phaser 6280DN
The cartridges used in these machines are as follows:
106R01388 Cyan STD cartridge (2200 pages) $147.00 list
106R01389 Magenta STD cartridge (2200 pages) $147.00 list
106R01390 Yellow STD cartridge (2200 pages) $147.00 list
106R01391 Black STD cartridge (3000 pages) $134.00 list
106R01392 Cyan HY cartridge (5,900 pages) $295.00 list
106R01393 Magenta HY cartridge (5,900 pages) $295.00 List
106R01394 Yellow HY cartridge (5,900 pages) $295.00 list
106R01395 Black HY cartridge (7,000 pages) $254.00 list
As you can see, these are extremely profitable cartridges to do.
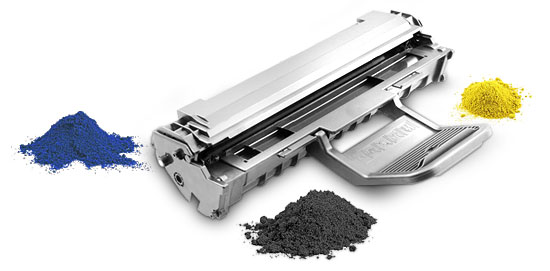
These cartridges use both toner and developer in the cartridges. This
system is a little different so we are including the cartridge/printer
theory here. Xerox uses different names for certain parts than we as an
industry normally do. I have included both names where this situation
happens.
Figure 1 shows the basic layout of the cartridges as they relate to
the printer and also list the steps used in the printing process. These
steps are covered in more detail below.
In the first stage, the primary charge roller (PCR or BCR as Xerox
calls it) places a uniform negative DC voltage on the OPC drum surface.
The amount of the negative DC voltage placed on the drum is controlled
by the printer’s intensity setting. The PCR cleaning roller removes any
toner or paper dust from the PCR. See Figure 2.
In the second stage, each color’s laser beam is fired onto a set of
fixed mirrors and then to the rotating mirror (called the scanner). As
the mirror rotates, the beams are reflected into a set of focusing
lenses. The beams then strike the drums surface, reducing the negative
charge and leaving a latent electrostatic image on the drum. The areas
where the lasers did not strike the drum will retain the higher negative
charge. See Figures 3 and 4.
The third or developing stage is where the toner is developed on the
drum by the developing section (or supply chamber), which contains the
toner and developer particles. The toner is moved from the hoppers by a
series of agitators into the developer section where the augers and
magnetic roller are located. The toner is brought out to the drum by the
magnetic roller. The toner is also held onto and attracted to the
magnetic roller by a negative DC bias voltage. This voltage is
controlled by the printer’s intensity setting and causes either more or
less toner to be attracted by the developer roller. This in turn will
either increase or decrease the print density. The amount of toner on
the magnetic roller is controlled by the doctor blade (or trimmer bar as
Xerox calls them), which uses pressure to keep the amount of toner on
the roller constant. See Figure 5.
As the laser exposed areas of the OPC drum approach the developer
roller, the toner particles are attracted to the drum’s surface due to
the opposite voltage potentials of the toner, and laser exposed areas of
the OPC drum. See Figure 6.
The fourth stage is the transfer stage. This is where there are some
large differences from monochrome printers and also from other color
lasers. In the primary transfer stage the transfer rollers, which are
located directly opposite each OPC drum, places a positive DC bias
charge on the back of the Transfer Belt. Each toner cartridge has a
separate transfer charge roller. As the paper moves through the machine,
the image is transferred from the drum directly to the paper. This
process is repeated for each color cartridge in the following order:
yellow, magenta, cyan and black. See Figure 7.
The paper separates from the transfer belt as the belt turns back
down to start the process again. The static charge on the back of the
paper is decreased with static charge eliminator (Detack saw). This
helps stabilize the paper feed, and also prevents toner flares (spots)
under low temperature and low humidity conditions. See Figure 8.
In the fifth stage, the image is then fused onto the paper by the
fuser assembly. The fuser assembly is comprised of the upper heating
assembly and lower pressure roller. The lower pressure roller presses
the page up into the upper heating assembly, which then melts the toner
into the paper. This heating assembly is based on older technology. It
uses a heat lamp and a pressure roller assembly and not the ceramic
heaters that many machines now use. See Figure 9.
OPC drum cleaning:
The drum is cleaned after the image is transferred to the paper by
the wiper blade. This part is fairly standard; the wiper blade scrapes
the toner off the drum, and the recovery blade guides it into the waste
chamber. These machines also have an erase lamp to remove any residual
charges from the drum and allow the wiper blade to clean better. See
Figure 10.
Cartridge troubleshooting will be covered at the end of this article.
1) Remove the two springs from either side to the cartridge. The
contact side is easier to remove if the cartridge is upside down. See
Figures 11 and 12.
2) Remove the screw from the black end cap on the contact side. See Figure 13.
3) Remove the screw from the white end cap. A small gear will come loose. Place it aside with the end cap. See Figure 14.
4) Remove the white end cap by prying up on the tab as shown. See Figures 15 and 16.
It’s important to press the lower contact plate down so it does not
become damaged. Two white gears will come off with the end cap. It is
best to store them on their respective shafts as shown. See Figures 17,
18, 19 and 20.
6) Remove the Single gear with the black axle as shown. Do not remove
the three remaining gears as they are attached inside the hopper. See
Figure 21.
7) Separate the two halves. See Figure 22.
8) On the toner hopper, remove the magnetic roller clip by lifting up
the two small tabs from the plastic shaft. Turn the contact toward the
flat side of the mag roller shaft and remove. See Figures 23 and 24.
9) Remove the large mag roller drive gear. See Figure 25.
10) Remove the front auger drive gear so the bearing can be removed. See Figure 26.
11) Remove the round bearings from both sides of the mag. roller. See Figures 27 and 28.
12) Remove the mag roller support bearings from both sides. See Figures 29 and 30.
13) Lift the mag roller out by lifting it up from the short shaft side. See Figure 31.
14) Remove the toner hopper sealing strip, and the developer chamber
sealing strip. NOTE: Save these seals as they will be re-used later. See
Figures 32 and 33.
15) Clean out all remaining toner and developer.
16) Install the mag roller long shaft side first. See Figure 34.
17) Install the support bearings on both sides of the cartridge. Make
sure the tab on the bushing is set in its slot as shown. See Figures 35
and 36.
18) Install the round bearings on both sides of the mag roller. See Figure 37.
19) Install the front auger gear. See Figure 38.
20) Install the mag roller contact. Set the fingers so they are
contacting the flat side of the shaft and turn the whole assembly until
it fits in place. See Figures 39 and 40.
21) Place a piece of paper across the developer chamber opening so it
blocks the mag roller. Fill the chamber with the dedicated developer.
Remove the paper. The paper makes it simpler to fill the chamber by
blocking off the mag roller. See Figure 41.
22) Clean the edge of the developer chamber opening with a cotton
swab dipped in alcohol. Clean the adhesive of the old seal and replace.
See Figure 42.
23) For standard yield cartridges, fill the toner chamber now. Clean
the edge of the chamber and adhesive part of the seal with alcohol and
re-install the seal. HY cartridges have two chambers so it is easier for
them to be filled later. Both chambers should be filled at the same
time in order to get the correct amount in each. (They will be filled at
the end of these instructions in step 46) See Figures 43 and 44.
NOTE: Do NOT mix the developer with the toner. They must be separate inside the cartridge for the system to work correctly.
Place the toner chamber aside.
24) On the drum chamber, remove the "E” ring from the contact or hub side of the drum. See Figure 45.
n 01, 2010
25) Pull the axle out from the gear side of the drum so that the inner drum ground contacts are not damaged. See Figure 46.
26) Remove the drum. See Figure 47.
27) Remove the PCR and clean with a lint free cloth. See Figure 48.
28) Remove the PCR cleaning roller, vacuum or blow any toner from the roller. See Figure 49.
29) Remove the two PCR/PCR cleaning roller holders, carefully pry
them up from the sides. Clean them with a cotton swab and alcohol. See
Figure 50.
30) HY cartridges have a seal and set of gears for the additional
augers. Remove the seal and clean out any remaining toner. See Figure
51.
31) Remove the two screws and the wiper blade. Clean out any toner from the waste chamber. See Figure 52.
32) Coat the wiper blade with your preferred lubricant and install. Install the two screws. See Figure 53.
33) Clean the PCR holders and PCR cleaning roller holders with a cotton swab and alcohol. See Figure 54.
34) Install the cleaned PCR/PCR Cleaning roller holders. See Figure 55.
35) Install the cleaned PCR cleaning roller. See Figure 56.
36) Install the cleaned PCR. Place a small amount of new conductive grease on the black holder side. See Figure 57.
37) Install the drum. See Figure 58.
38) Install the drum axle from the hub side. See Figure 59.
39) Install the E ring. See Figure 60.
40) On the toner hopper, install the white auger gear as shown. At
this point the remaining gears must also be set properly. If the
cartridge is a HY the top two gears must point to the arrows on the
cartridge as shown. For all cartridges on the lower half, the gears must
be pointing to the arrow and gear as shown. See Figure 61.
41) Install the developer roller drive gear. See Figure 62.
42) Place the two halves together. See Figure 63.
43) With the two gears placed on the black end cap. Install the end
cap. Make sure the tab locks in place. Install the screw. See Figures
64, 65 and 66.
44) install the white end cap and screw. Place the small white gear in as shown. See Figures 67 and 67A.
5) Install the springs on both sides of the cartridge. See Figures 68 and 69.
46) If you have a HY cartridge, fill the upper (Drum Unit) and lower
(Toner) hoppers now. We have found it best to fill the upper hopper with
a quarter of the bottle and the rest in the lower hopper. See Figure
70.
47) Remove the old chip by prying out and lifting up on the black
plastic holder. Remove the old chip from the holder and slide the new
chip into the rails. Make sure it snaps into place. See Figures 71, 72
and 73.
48) Install the chip holder assembly onto the hopper. See Figure 74.